Before I so suddenly gave up on this challenge (the blog's sudden demise will be explained in the next few weeks :) ) I had decided to start a program called blogging for books. It's a Christian publishing company that sends readers free books for reviewing said books in return. I thought it would be a nice change of pace to do a monthly post that shared something interesting I'd read lately (in case you don't know, I like to read even more than I like to cook!)
So since I'd already committed, here goes my first book review:
I received Dragons of the Valley for free from WaterBrook Multnomah Publishing Group for this review:
I'm an avid reader and I've always enjoyed exploring new fantasy worlds. I was excited to give this Christian allegory a try. Unfortunately the first 5 times I picked up the book, I was unable to progress past the first two pages. I was confused, lost, and frustrated. A lot of new terminology is thrown at the reader right off the bat, and it was overwhelming to me. Fortunately I gave it one last try and forced myself to complete the first chapter.
After reading the first chapter, it was pretty clear this was not the first book in the series. Hopefully if you've read the sequel(s) to Dragons of the Valley you won't have the frustrating start I did.
That said, once I got into the meat of the book I was intrigued. I loved being able to picture all of the different people types, especially the sprightly kimen. Dragons, and sword-fighting and magicians, oh my! I'll definitely be looking into other books in this series.
I also enjoyed the interplay with the main few characters. I think the reader is most meant to relate to the Princess of the story and I do think that many female young-adult readers would agree. However I feel like there is plenty of masculinity to make it an interesting read for guys as well.
There was a HUGE Christian tie-in, and I feel like the author did a great job of relating many of the most well-known aspects of Christ & God in this book. It was unique to read it from a fantasy perspective, and she did a good job of keeping the story from getting too 'preachy'.
My main complaint is a bit of a spoiler, so please stop here if you've not read the book. I'm disappointed that the author felt that the Princess must find 'true love' to be fulfilled. I personally believe that God/Christ can be enough without a human love interest to fulfill a young woman's life. It was also 'tacked' on so close to the end, that it just felt like a last-minute edit.
Otherwise, if you enjoy fantasy novels and are interested in a unique Christian perspective, then I highly recommend this book to you.
May 2, 2011
March 15, 2011
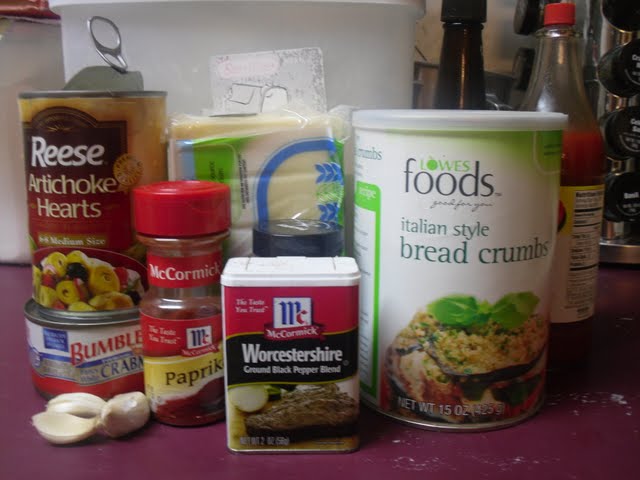
Hot Artichoke Crab Dip

I thought about this recipe all weekend. I knew it was going to be pricier than my average meal, but once we started talking about crab dip, I just had to get my fix.
I wanted to make it a mixer recipe, but the directions didn't call for use of a mixer. Mr. V remembered however that at the restaurant they whipped the crab meat before adding it. (FYI...I think you could just as easily skip this step)
This meal was a LOT of work. You could make it a little easier by buying pre-quartered artichokes, minced garlic and pre-shredded cheese. But it was so worth it. We sat down to eat and the smell just made us groan with pleasure. Mr V took one bite and started to grin. At first I thought he was laughing because I seriously goofed something up, but he said 'Some foods are so good they just make you smile to eat them' I have now been declared 'Master Chef' which is a pretty high compliment from someone who cooks for a living!
adapted from allrecipe's crab meat sycamore
1 6oz can lump crab meat, drained
11oz of quartered canned artichokes (3/4 of a can with enough left over for a pizza)
8oz shredded Swiss cheese (I don't care for Swiss, but go for it!)
2 tablespoons butter
1 1/2 tablespoons flour
3 cloves garlic, minced
1 tablespoon shy of 1 cup cream
1/4 teaspoon hot sauce
1/4 teaspoon Worcestershire sauce
1/2 teaspoon dried parsley
salt and pepper
Italian breadcrumbs
sweet paprika
Serve with lemon wedges and slices of French bread

Equipment:
Saucepan
Whisk
5 Ramekins (or a 9in casserole dish) on a cookie sheet
Directions:

- Whip the crab with the whisk attachment (optional)

- Layer the artichoke pieces in a solid layer over the bottom of your bake-ware

- Evenly spread the crab meat over the artichokes

- Completely fill your baking dish with shredded Swiss (don't pack too tight or the sauce won't run through later)

- Melt the butter in a saucepan over medium-low
- Add the garlic to the butter while it's melting
- Whisk in the flour until smooth
- Slowly whisk in the cream and stir until just starting to thicken (if it gets too thick you can add a couple tablespoons of milk until it's a pouring consistency)
- Mix in the hot sauce, Worcestershire, parsley and salt & pepper

- Pour over the shredded Swiss cheese, using a fork to poke holes in the cheese if you need to
- Top with bread crumbs & paprika
- Bake at 350F for about 30 minutes until bubbly
Cost:
| Artichokes | 2.68 | |||
| Crab | 1.78 | |||
| Swiss Cheese | 1.75 | |||
| Cream | 0.98 | |||
| Flour/Butter/spices/breadcrumbs | 0.25 | |||
| 7.44 | $1.48 per serv. | |||
March 14, 2011
French Bread
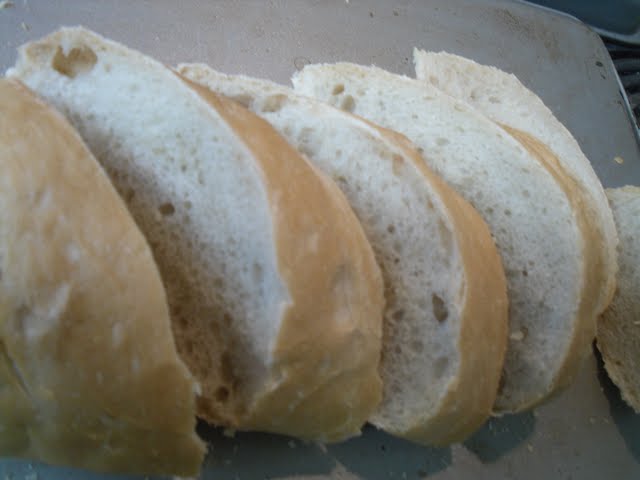
Last week Mr V and I were reminiscing about the crab dip from one of the seafood restaurants where he used to work. It was sooo warm and rich and satisfying. They served it with toasted slices of French bread, cut on the diagonal to obtain more surface area for the dip. Garnish with a bit of lemon juice....divine! It was an appetizer, but I would order it for my main course.
 It's been about 4 years since he worked there, and at least that long since I've eaten the hot crab dip. I thought I could find a similar recipe, but first things first, I'd need some French Bread. After much googling, I stumbled across this tutorial by Jaden Hair, complete with amazing professional photos and extra helpful tips.
It feels a bit silly and redundant to post the same information, but for the sake of the challenge here goes my attempt. In the meantime, I HIGHLY recommend you visit Jaden's site.

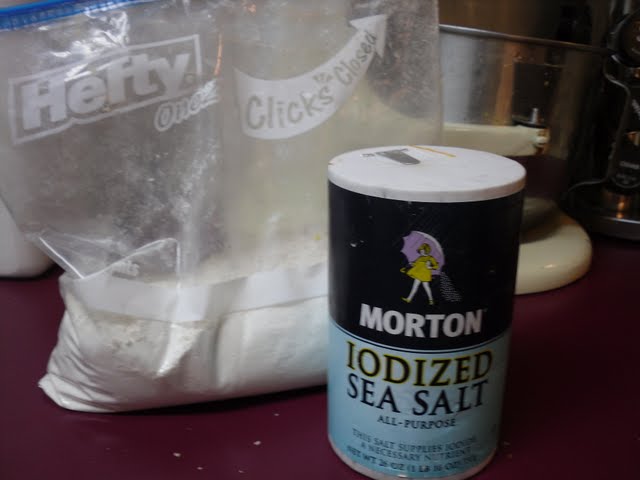
3 3/4 cups bread* flour
2 teaspoon active quick rising dry yeast
2 teaspoon salt
1 1/2 cups warm water
1/4 cup bread* flour
* I used all-purpose flour and the loaves were still fantastic. My understanding is that bread flour has a more precise gluten content specific to bread, but it isn't necessary to go out and buy if you have all-purpose.
Equipment:
- Mixer with beater attachment AND dough hook
- Inverted cookie sheets or preferably a pizza stone
- Sturdy bread knife
Directions:

- Pour flour into the mixing bowl. Add the yeast on one side and the salt on the other
- Pour in the warm water and mix on low with your beater until the dough starts to form a single mass

- Switch to the dough hook and kneed on medium for 2 minutes. (I had to add a couple extra tablespoons of flour to get the dough dry enough to release from the sides of the bowl. Add any extra flour slowly so you don't make it too dry)
- Let the dough rest for 5 minutes
- Mix again with the dough hook for 3 minutes

- Remove the dough from the bowl and place it on a clean, lightly floured surface
- Kneed by hand, incorporating an extra 1/4 cup of flour
- Continue to kneed until you can form the dough into a smooth ball

- Spray your mixing bowl with oil and place the dough ball inside, making sure the entire surface of the dough is lightly coated in oil.
- Cover and let rise for about an hour and a half in the warmest area of your house
- After the dough has risen, punch it down and form it into a ball again.
- Preheat your oven to 450F and place your pizza stones or baking sheets inside

- Split the dough into two evenly sized pieces and set one aside, covered with a warm damp cloth
- Stretch out your working dough into a large rectangle.
- Fold the rectangle in thirds over itself lengthwise
- According to Jaden, you must 'karate chop' down the middle seam to seal in the air. This was my favorite part :)

- Stretch out the dough lengthwise and then fold in half again length wise. Position so the seam is on the bottom and pinch the ends to seal in the air.
- Let the loaves rise on a well-floured surface for another 30 minutes

- Make 4 shallow diagonal slices on the top of each loaf to allow steam to escape while baking
- Transfer the loaves each onto their own preheated baking surface

- When placing the loaves into the oven, toss 1/2 cup of water into the bottom of the oven (if your oven is electric). The resulting steam will create an amazing hard crust on the bread.
- Bake 20-25 minutes or until the internal temp is around 200F
Cost:
| flour | 1.30 | ||
| yeast/salt | 0.10 | ||
| 1.40 | $.70 per loaf |
March 12, 2011
Peanut Butter Eggs


While still good, I was a bit disappointed by this recipe. It just seemed way too overly sweet, but this could be partially due to my using sweetened peanut butter. Also, I saw in the reviews that the plastic eggs made great molds for the peanut butter shapes, and that after frozen, the peanut butter eggs would tap right out of the molds....not!!! The molds ended up being mostly a waste of time. Just shape the pb dough by hand, or maybe even make bigger eggs as seen below:


- 1 (16 ounce) package confectioners' sugar - this ended up being around 3 un-sifted cups for me, but weigh if you can.
- 1 cup creamy peanut butter
- 1/4 cup butter, melted
- 1 tablespoon milk
- 1 teaspoon vanilla
- 8 (1 ounce) squares semi-sweet chocolate
- 1 tablespoon butter
Mixing Bowl w/ Beater attachment (I tried the whisk, but I think the beater would have creamed the butter & sugar better)
Directions:

- Cream sugar, peanut butter, butter, milk and vanilla. (continue beating and adding drops of milk until the mixture is silky rather than lumpy)
- Shape into small or large eggs and freeze for at least an hour

- Dip in melted chocolate/butter mixture, or coat with the mixture if that's easier
Cost:
| peanut butter | 0.95 |
| Sugar | 1.25 |
| Chocolate | 1.25 |
| Butter | 0.41 |
| 3.86 |
March 10, 2011
Thai Peanut Sauce

Oooh what warm, hearty goodness. This recipe is absolute comfort food, especially with yesterday's home-made noodles. You don't need a mixer for this Thai peanut recipe, but it did assist in making an especially smooth sauce. It almost could have been a soup. Mr. V could not stop raving about this meal, even the next day. And at a total cost of $1.34 for 3 servings...what a bargain!

1/2 cup chicken broth
3 tablespoons peanut butter (the more natural, the more flavor...I'm trying to move toward more natural foods, but am being a bit hypocritical by using up the last of my processed stash)
3 tablespoons soy sauce
1 1/2 tablespoons honey
1 clove chopped garlic
up to 2 teaspoons hot chili paste (optional....I used a half teaspoon and it added a spicy flavor without much burn)
chives/green onions for garnish
Equipment:
bowl & wisk
small saucepan
Directions:

- Whisk together all ingredients until smooth

- Cook on low until bubbling

- Serve over noodles and/or chicken
Cost:
| Peanut Butter | 0.23 | |
| Honey | 0.15 | |
| Soy Sauce | 0.19 | |
| Chili Sauce | 0.05 | |
| Garlic | 0.02 | |
| chicken broth | 0.25 | |
| 0.89 | ||
March 9, 2011
Udon Noodles

I found this yummy looking Thai peanut sauce recipe today and it recommended serving over Udon Noodles. We certainly didn't have any, so I'm not sure what possessed me, but I decided to see if it was something I could make from scratch. Sure enough! It's pretty simple. I'd never made noodles before, and these turned out a bit thick and lumpy, but still delicious. ESPECIALLY with the Thai peanut sauce.Yummmmm. Between the 2 recipes, the total cost was $1.10 (it would cost about .20 more cents if you buy your flour from the grocery store instead of a club store - or obviously more if you added chicken). Mr. V and I were both stuffed. It easily
I don't really have a source as I compiled several how-tos after googling 'how to make udon noodles'.
3 cups flour
2/3 cup water
1 teaspoon salt
Equipment:
Mixing bowl with beater or bowl and floured hands
Floured surface
Santoku or other flat-bladed knife (I used a really sturdy bread-knife that worked well)
Large pot of boiling salted water
Directions:

- Pour flour and salt into bowl and turn the mixer to low speed (about 2 on KitchenAid mixers)
- Slowly trickle in the water while mixing.

- Let mix for about 5 minutes, making sure the dough is tacky not sticky
- Dump the dough out onto a large piece of plastic wrap.

- Fold the plastic wrap over on top, and smooth the dough into a disk.
- Let sit for several hours

- Unwrap the disk onto a floured surface and roll out into a rectangle about 1/8 inch thick

- Fold the dough in half
- Cut into strips - approximately 5 strips per inch
- Drop into boiling water, being careful to not overcrowd.
- Cook a few minutes before draining and serving
| flour | 0.44 |
| salt | 0.01 |
| 0.45 |
Sweet Potato Dinner Rolls

I had decided to make Amish White Bread again, since we're out of bread. Ya'll almost missed out on a post! BUUUT I talked myself into trying something new and made Sweet Potato Rolls instead. These make a really soft, hearty roll. If you're expecting lots of flavor you'll be disappointed at first like I was. But these accompany flavorful foods well, and kick it up with a little depth of their own.
My main changes from the original recipe are: I doubled the recipe minus one egg (I'd run out) and I left the first rise for 3 hours instead of 1. Afterward the dough was falling over the sides of the bowl. I got so excited, I completely missed taking that picture.
We all really liked these dense fluffy rolls. In fact, I gorged myself so much that I was still full when I woke up this morning!

2 (.25 ounce) packages active dry yeast
1/2 cup white sugar
1 cup sweet potato puree (canned or homemade)
1 cup warm water, ~ 110 degrees F
1/4 cup and 2 tablespoons margarine, softened
2 teaspoons salt
4 eggs
7 cups all-purpose flour
Equipment:
Mixer with dough hook
9x13 pan
Directions:

- Combine water, yeast, and 2 tablespoons sugar in the mixing bowl
- Add remaining ingredients EXCEPT the flour and stir till well incorporated

- Slowly incorporate flour until the dough forms a ball and starts to pull away from the edges of the bowl

- Remove the bowl from the mixer and coat the ball of dough in oil
- Cover and let rise for at least 1 hour

- Punch down the risen dough and let rest for a few minutes

- Separate the dough into uniform balls and place in the pan.

- Let rise until doubled
- Bake at 375F until toothpick comes out clean ~ 20 minutes

- Serve hot (though also good cold)
Cost:
| Sweet Potato | 0.75 | |
| Yeast | 0.66 | |
| Sugar | 0.08 | |
| Butter | 0.5 | |
| eggs | 0.5 | |
| Flour | 1.03 | |
| 3.52 | .15 c each |
March 7, 2011
Corn Bread


7 tablespoons butter, softened
2/3 cup sugar
2 eggs
1 cup 2 tablespoons milk
2 1/3 cup self rising corn bread mix
Equipment:
Bowl & Spoon or Mixer & Beater attachment
9 inch pan (round or square)
Directions:

- Cream the butter & sugar

- Combine rest of ingredients till well blended

- Pour into greased baking pan
- Bake at 400 for about 25 minutes until a toothpick comes out clean

- Cut & Serve. Enjoy!
Cost:
| butter | 0.58 |
| eggs | 0.25 |
| sugar | 0.12 |
| milk | 0.23 |
| CornBread Mix | 0.88 |
| 2.06 |
Subscribe to:
Posts (Atom)