February 28, 2011

Mayonnaise Biscuits


You may have noticed the lack of posts lately....two weeks lately. My card-reader stopped working, and it was just so unmotivating to write posts without pictures. For the most part I kept up with the mixing challenge despite the lack of posts (I missed a couple days last week while I was nasty sick), so I'll be trying to catch up one extra post a day for the next couple weeks. In going through my photos it does appear that I forgot some crucial photos of the finished product, so bear with me if you will. I'll probably make these recipes again at some point and will update accordingly. Or you could make them, and send me the pictures....That's a fantastic idea, really!

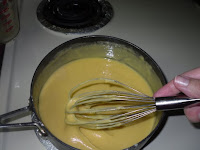
Last week, right before I took a sick-break, I made mayonnaise. From scratch! REALLY easy, super cheap, and a lot less frightening than what store-bought mayo must be made of because this goes bad rather quickly. Today was day 6 and it's not recommended you keep it longer than 7 days, so I've been trying to finish it up. Ah la, Mayonnaise Biscuits. Only 3 ingredients, easy, and fun to customize.


 Ingredients: yields about 24 biscuits


2 cups self-rising flour (or 2 cups all purp. flour w/ 1 teaspoon salt and 1 tablespoon baking powder)
1 cup milk
6 tablespoons mayonnaise


Equipment:

Mixer with beater attachment or bowl & fork
Cookie sheet(s)
Spoon


Directions:

  • Preheat oven to 400 and lightly grease baking sheets
  • Mix together all ingredients on low until lumps are gone (at the last minute I threw in some Parmesan and dried chives)
  • Drop spoonfuls onto the baking sheet
  • Bake for 12-14 minutes (until lightly browned and sound hollow when tapped)


Tips & Variations

  • Scrape down the sides of the mixing bowl at least once.
  • Add Parmesan & Chives, or Cheddar & Garlic, or a little cinnamon & top with jam
Cost:


Mayo 0.19


Flour 0.30


Milk 0.17


0.66
less than $.03 each


February 26, 2011

Honey Mustard

 
Thanks to Mr. V's help, we now have 20 pounds of chicken in our freezer - cooked, shredded & portioned. That's 2 solid weeks of nearly instant meals...yay! (Not that we'll eat chicken 14 days in a row. -Shudder!-)

I wanted to use some of our overabundance of mayo, but Chicken + Mayo didn't sound very appetizing. Luckily, you can turn mayo into honey mustard which is our favorite breaded-chicken condiment!

Ingredients: yield 1/3 cup

1/4 c mayo
1 tablespoon honey
1 tablespoon mustard (traditionally yellow, but I love deli mustard!)
1/2 tablespoon lemon juice

Equipment:

Mixer with beater attachment or bowl and fork
Pretty(or not) serving/storage bowl

Directions:

  • Mix all ingredients thoroughly
  • Serve


Cost:


Mayonnaise 0.14
Mustard 0.13
Honey 0.11
Lemon juice 0.02

0.40

February 22, 2011

Mayonnaise - DIY


I once saw Alton Brown make mayonnaise from scratch....and I've wanted to attempt it ever since. We don't eat mayo very often though. I usually end up losing part of each jar to expiration - which is especially scary because store-bought mayo has a fairly long shelf-life. Home-made mayo, on the other-hand, is only good for about 7 days. But it's cheaper and less chemically plus it's easy to make only the amount you need.

Homemade mayo looks a bit more yellow than the store-bought stuff due to the eggs. Not entirely sure how they get commercial mayo so white?! If anyone knows, feel free to clue me in! In fact, Alton probably covered this in the episode I watched, but it was years ago and I don't remember.

Ingredients:  yield 1 pint

2 eggs (1 separated)
1 1/2 cups canola oil
2 teaspoons lemon juice
1 teaspoon salt
1 teaspoon prepared mustard

Equipment:

Mixer with whisk attachment
Seal-able container such as a canning jar


Directions:

  • Mix 1 egg and 1 egg yolk with the lemon juice, mustard, and salt. 
  • Beat until foamy
  • With the mixer running as fast as possible without splashing, slowly pour the oil into the egg mixture. It should take about 3 minutes for you to blend in the full 1.5 cups of oil.
 
  • Pour into a container and store in the coldest part of your fridge for up to a week.


Cost:


oil 0.75


salt/mustard/lemon 0.10


eggs 0.25


1.10
$2.20 / qt compared to $3-5 per quart in the store

February 21, 2011

Washboard Cookies


After The Puffies last Saturday I was still in the mood to make cookies. I wanted something dairy free that I could share with my sister, and that I wouldn't feel too guilty about sharing with the 2 year old as well. This recipe was posted by a 90 year old who enjoyed these as a childhood treat. Wow! I love history, so this piqued my interest.

These are plain but satisfying, similar to shortbread. They'd be great dipped in chocolate or perhaps topped with cinnamon sugar.


Ingredients:

1/2 cup shortening or softened butter
1 cup dark brown sugar
1 egg
1/2 teaspoon baking soda
1 tablespoon hot water
1 teaspoon vanilla extract
1 3/4 cups flour
sugar for topping

Equipment:

Mixer & beater attachment or bowl & spoon
Cookie sheets

Directions:

  • Grease the cookie sheets and preheat oven to 325F


  • Cream the shortening, sugar, and egg


  • Add flour and mix well
  • Use your hands to roll into walnut sized balls


  • Lay on the baking sheet about 2 inches apart and flatten with a fork
  • Sprinkle a generous amount of sugar on top
  • Bake for 15-20 minutes until the edges just start to crisp


Cost:


shortening 0.50
brown sugar 0.50
flour 0.25
egg 0.12
vanilla/baking powder 0.02

1.39 .06 c each

February 12, 2011

Hazelnut Cups


There's something so pure about little paper cups all lined up, just waiting to be filled. I fell in love with this picture. I think the gradiation gives it some character, though after my photography class this morning I can tell the lighting is all wrong. I haven't had much time to practice the photo techniques I learned, but I see a lot of things that need improvement. My main changes today are: 1) these pictures were taken with Mr. V's iphone since my camera is giving me trouble; 2) I only used the flash once; 3) I only cropped one photo. Typically I use the flash and edit every single photo even if only to crop it.


With a combination of the 2 year old's surgery Monday morning, our Lord's day keeping tomorrow, and Mr. V's no-S diet; I decided to make this years Valentine's treat a little early. Chocolate is always appropriate...I received some incredible Russian chocolates from Mr. V and returned the favor with these little treasures.


Ingredients: yields 12 small cups


Cups:
1/2 cup chocolate chips - the mini's melt quicker
1/2 teaspoon vegetable oil

Filling:
1/2 cup heavy or whipping cream
2 tablespoons coffee liquor
1 teaspoon white sugar
4 tablespoons Nutella


Equipment:

Mixer with whisk
12 paper candy or mini-cupcake liners
small microwaveable bowl
spoons


Directions:
  • Combine the chocolate chips / oil in the microwaveable bowl 


  • microwave at 60% power in 15 second increments - stirring after each 15 seconds until melted


  •  Coat the inside of each paper cup with chocolate (about 2 teaspoons per cup) then let them set in the fridge for at least 5 minutes. I used a cookie pan to make the fridge transfer easier.


  •  Whip the cream, sugar and coffee liquor until stiff peaks form. Then at a medium speed, beat in the Nutella. Also, fold in any chocolate leftover from the cups.


  •  Spoon or pipe the filling into the chocolate cups. 


  • Peel the paper off the cups, garnish & serve. You could also garnish with a dollop of whipped cream, a sprig of mint, some heart-shaped red-hots, or...well anything really.


Cost:  ~ $0.16 per cup

chocolate chips 0.62
heavy cream 0.75
coffee liquor 0.05
Nutella 0.50
sugar 0.02
oil 0.01

1.95

February 10, 2011

How to make butter - one ingredient recipe

(Pictures coming soon)

A couple years ago I wanted to learn how to make 'everything' from scratch. I tried making yogurt, butter, cheese, etc. The yogurt is the only thing I really stuck with as it is extremely cost effective and I had the equipment. But the butter....oooh the butter was amaaaazing. It was cool and silky and oooh so creamy. However it took 15 minutes of vigorous shaking cream in a jar. It simply wasn't worth the trade-off of mush-arms (at least not with a toddler who doesn't understand why mommy can't make supper because she can't lift her hands above her knees).

Now enter the KitchenAid! Scratch-made butter and full use of both arms!

Ingredients:

1 cup heavy cream - yields around 5oz. butter and 1/2 cup buttermilk

Equipment:

Mixer with paddle or whisk attachment

Directions:

  • Pour the cream into the mixer bowl
  • Turn to the highest speed possible while avoiding a splash mess - this was about 6 for me
  • Let the mixer beat for about 10 minutes
    • After 4-5 minutes you'll have stiff whipped cream
    • After 7-8 minutes you'll have buttercream that is starting to turn a pale yellow
    • After 10 minutes, the butter will suddenly release a ton of liquid. Continue beating about 30 seconds after this happens
  • Strain off the liquid (buttermilk - you can keep this for a couple days to cook or bake with). Any liquid left, can cause the butter to go bad quickly. Your best bet is to squeeze as much from the butter as possible.
  • Rinse the butter in ice-cold water and beat in the water for 30-60 seconds.
  • Repeat the draining & squeezing step
  • Dish your butter into a bowl, press into a mold, or shape with your fingers.
  • If rinsed well, the butter should keep refrigerated up to a week. You can also freeze it for a couple months.
Cost:

1 cup heavy cream = $.99

Compare to 5oz. butter @ our local Walmart right now = $.82

February 9, 2011

Amish White Bread

(Pictures to come soon.)

This is my absolute favorite bread recipe. It makes delightful squishy soft rolls with just a hint of sweetness. It's loaf is also fantastic - dense enough to toast nicely and to withstand a layer of jelly without sogging up. My favorite way to serve Amish white bread is toasted with a generous smear of Nutella, though it also goes well with savory dishes. Just to give you an idea how popular this bread is - within 30 minutes of pulling it from the oven, 7 rolls were gone. The two year old begs for it as soon as he sees the pan.

As much as I love Amish white bread....I dread making it without a mixer. It's messy and coats your hands and arms and gets really difficult if you try more than one batch at a time. Thanks to the Kitchenaid that has all changed! (Hmm...that came out a bit like an infomercial) I easily whipped up a double batch with my trusty mixer, although it nearly overflowed the bowl. Now I just need to start practicing self-control....as those hot rolls sit there calling my name.

Ingredients: - makes around 45 rolls or 4 loafs


4 cups warm water (105 - 110 degrees F)
2 packets or 3 tablespoons dry active yeast
1 1/3 cups white sugar
1 tablespoon salt
1/2 cup vegetable oil
11 cups all purpose unsifted flour


Equipment:


Stand mixer with dough hook
4 loaf pans or 5 or 6 round cake pans
Baking spray


Directions:


Tips & Variations:
  • If your house is cool/drafty, let rise in a warm oven (not over 110 degrees F)
  • Reduce the sugar to 1/4c for a plain white bread

Cost:


Flour 1.76
Yeast 0.66
Salt 0.02
Oil 0.25
Sugar 0.19

2.88


0.06 per roll

0.70 per loaf

Cheese Souffle


One of my favorite mac'n'cheese recipes comes from Alton Brown, the 'science guy' of cooking. I'd love to know his fun sciency explanation as to why mustard powder is so crucial to all things cheese, but for now I'll just take his word for it! When I saw he had a recipe for cheese souffle and that it requires a mixer....this creation was born.

You may not have mustard powder, but I urge you to get it. It makes the most inexplicably delicious mac'n'cheese and I can't imagine this souffle without it. Here's a spice website generally cheaper and fresher than grocery store spices.

Mr V enjoyed it but he isn't obsessed with cheese quite as badly as I am. All but a small sliver of this dish was gone....I don't know how! It certainly wasn't because I gave up refilling my plate and just carried the whole souffle dish to the couch with a big spoon. (It was a smallish spoon)

Ingredients:

Butter for greasing the souffle
2 tablespoons parmesan - the cheap powdery stuff is ideal for this purpose...yay!

3 tablespoons butter
3 tablespoons flour
1 teaspoon dry mustard
1/2 teaspoon garlic powder
dash of kosher salt
1 1/3 cups milk - heated
5 eggs - separated into 4 yolks and 5 whites. The whites can go directly into the mixer's bowl
6 ounces sharp cheddar, crumbled or shredded
1/2 teaspoon cream of tarter - if humid environment

Equipment:

(From now on we'll assume you always need measuring cups and spoons)
Medium size pot
Whisk
Mixer with whisk attachment
Medium bowl
8 inch round baking dish with high sides - you could also separate this into individual ramekins,  though this would change the baking time.


Directions:

  • Grease the baking dish with butter then coat with the Parmesan. Refrigerate the dish while you are preparing the souffle. 
  • Preheat the oven to 375F.
  • In the medium bowl, combine the flour, mustard, garlic, and salt
  • In the saucepan heat the butter


  •  Whisk in the flour mixture and cook for 2 minutes


  • whisk in the hot milk 
  • turn the temperature to high and heat till boiling while stirring
  • once boiling, turn the temp to low


  •  whisk in the chunked cheddar over low heat (I also used the leftover Parmesan from coating the baking dish)
  • This takes a while, but be sure to whisk until the cheese is completely melted.
  • Resist all temptation to drink this, or pour over hot noodles .... or was that just me?


  •  In the meantime, beat the egg whites (with the cream of tartar if needed) into stiff peaks
  • 1/4 at a time, gently fold the whites into the hot cheese mixture.


  •  Pour the fluffy cheesy goodness into the baking dish


  •  Bake at 375F for about 35 minutes


  • Scoop into your serving dishes and serve with a salad, veggies or something healthy (this way you don't feel as guilty while you're sitting on the couch eating the entire baking dish with your spoon)


Cost:

Eggs 0.62
Cheddar 0.56
Butter 0.12
Spices 0.03
Parmesan 0.37
Flour 0.05
Milk 0.3

2.05

February 8, 2011

Whipped Sweet Potatoes - Attempt #1


No, I didn't attach the wrong picture here. This is called making lemonade when life hands you rotten sweet potatoes. I had planned on making one of our favorite suppers - sweet potatoes with pulled beef and onions. Except I was especially looking forward to today's meal, as I'd never whipped sweet potatoes before and it sounded divine!

Unfortunately it wasn't until I served up the mouth-watering whipped concoction at 9:30p that I realized there were hundreds of strange little brown and pink rock-hard lumps all in it. I don't know much about the 'going bad' process of sweet potatoes, but this sure didn't seem right. As a result, I lost my appetite and Mr. V ate the beef & onions as tacos.

Planned ingredients

Potatoes prepped with balsamic sauce

Drooling deliciousness

My sweet potatoes are growing little brains...yuck!

I'll be headed to Harris Teeter tomorrow to complain. I just bought these on Saturday! I should have known better too, because I was picking from a disappointing selection of half-rotten fruit-fly-covered potatoes, but I thought I'd found a healthier section in a different part of the produce department.

I'll post the recipe next time when I try again :) It really is fantastic even when the potatoes aren't whipped. I can't wait to try them all light and fluffy!

February 5, 2011

Thick Stackin' Pancakes


It's been a backwards day. We had pie for breakfast and pancakes for desert. The 2 year old had a long day, and his nap was postponed until 4pm. Turns out a late nap = early bedtime. Poor boy didn't even wake up for pancake supper. Don't worry, I saved him some!

I discovered today's recipe a few months ago, and I think it's our second favorite (only due to the lack of chocolate). It never makes quite enough, so today I doubled the batch with the help of the KitchenAid. Turns out it wasn't much help. I couldn't tell a taste or texture difference between hand-mixed and mixer-mixed; but since you have to dirty a mixing bowl anyway, I guess you'd might as well let the machine do the work.

Ingredients:
Makes about 15 small or 6 large pancakes

1.5 cups milk
2 tablespoons white vinegar
2 cups flour
1/4 cup sugar
2 teaspoons baking powder
1 teaspoon baking soda
1 teaspoon salt
2 eggs
1/2 stick (1/4 cup) melted butter


Equipment:

Fork or whisk
Measuring cup/spoons
Large mixing bowl (or mixer bowl and beater paddle)
Small bowl
Skillet
Spatula

Directions:

  • Combine milk & vinegar in the small bowl and let sit (sour) for 5 minutes
  • Combine the dry ingredients in the large mixing bowl
  • Whisk the egg & butter into the soured milk


  • Pour the liquid mixture into the mixing bowl and beat until lumps are gone. I used setting 2 and it took less than 60 seconds.


  •   Cook in the skillet on medium heat. I found cooking spray kept the pancake from browning correctly so I only used it on this first one.
    In honor of Superbowl Sunday, I made the 2 year old a football (or possibly a squished baseball) pancake for tomorrow's breakfast.


    Tips & Variations:
    • Add nutmeg or a dash of other spices to the batter. Cinnamon maybe? 
    • Cook until bubbles appear on the surface. Flip with a spatula, and cook until browned on the other side. 
    • Lay metal cookie cutters in the bottom of the pan and pour the batter inside to make shapes (or free-hand it like my foot/base ball)
    • Make your own syrup. Easy and amazing: 1c packed brown sugar, 1/2 c water, 2 tablespoons butter, 1/2 teaspoon of your favorite extract (I used rum). Cook until sugar is dissolved. You could make this in the microwave in a matter of seconds.
    Cost:


    flour $0.29
    milk $0.34
    vinegar $0.02
    sugar $0.04
    eggs $0.25
    butter $0.33

    $0.94

    Amish Custard Pie


    Last grocery trip I spotted some clearance cottage cheese. I thought it might be a good way to get my 2 year old to consume some protein as he likes both yogurt and cheese...and cottage cheese seemed like a nice blend of the two. Somehow it slipped my mind that he 'can't' eat lumps in his food....d'oh. This left me with 16 ounces of cottage cheese that had to be used by this weekend. I started hunting.

    Using allrecipes' ingredient search I discovered this gem. I love Amish recipes (though I'm never certain how traditional they are). They're generally simple, affordable, and very satisfying. I made this yesterday, but we didn't try it until this morning for 2 reasons: Mr. V is on the 'No S' diet, which limits his sweets to weekends and special days. Also, the recipe suggests letting the pie sit for a day before eating.


    I thought it was a bit decadent to have pie for breakfast, but didn't want to wait any longer to try it. Turns out this is a great breakfast pie. It's not too sweet, but rather refreshing with just a hint of lemon. It reminded me of a very soft, light cheesecake.

    Ingredients: - I don't know what happened to my ingredients picture....and I'm way too lazy on a Saturday morning to gather everything together for another one. Apologies!

    16oz cottage cheese
    1 cup white sugar
    3 tablespoons flour 
    1 teaspoon lemon juice
    1 pinch salt
    1 12oz can evaporated milk
    1.5 cups milk
    3 eggs - separated
    2 9in pie crusts


    Equipment:


    Mixer bowl / whisk attachment
    Mixing bowl
    Measuring cups
    Measuring spoons
    Pie server
    Pie pans
    Spatula for folding


    Directions:


    • Beat the egg whites on high. Picture to the left is after 30 seconds of 'whipping'


    •  After 60 seconds


    •  After 2 minutes...these eggs know who's boss!


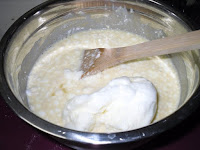
    •  Mix all the other ingredients together in a separate bowl, then gently 'fold' in the egg whites.


    •  Pour into your pie crusts - I used a pre-made graham crust on the left, and attempted a crust-less pie in the pie dish on the right


    •  Bake @ 425 F for 15 minutes then @ 350 for 25 minutes or until a knife comes out clean.  This was the perfect amount of time for the pie on the left, but the one on the right had much more custard and took a bit longer. The white 'break' in the middle of that one is from the several (8 or 9) times I tested it.


    Cost:


    graham pie crust $0.99
    cottage cheese $1.89
    lemon juice $0.05
    milk $0.34
    evaporated milk $0.79
    eggs $0.37
    flour $0.05
    Two Pie total $4.48
    Cost of each pie $2.24